Synology NAS (DSM 7.2) Deployment (QNAP Similar)
DSM 7.2 supports Docker Compose, so we recommend using Docker Compose for one-click deployment.
Create Configuration and Data Directories
Create an AutoBangumi folder under /volume1/docker/, then create config and data subfolders inside it.
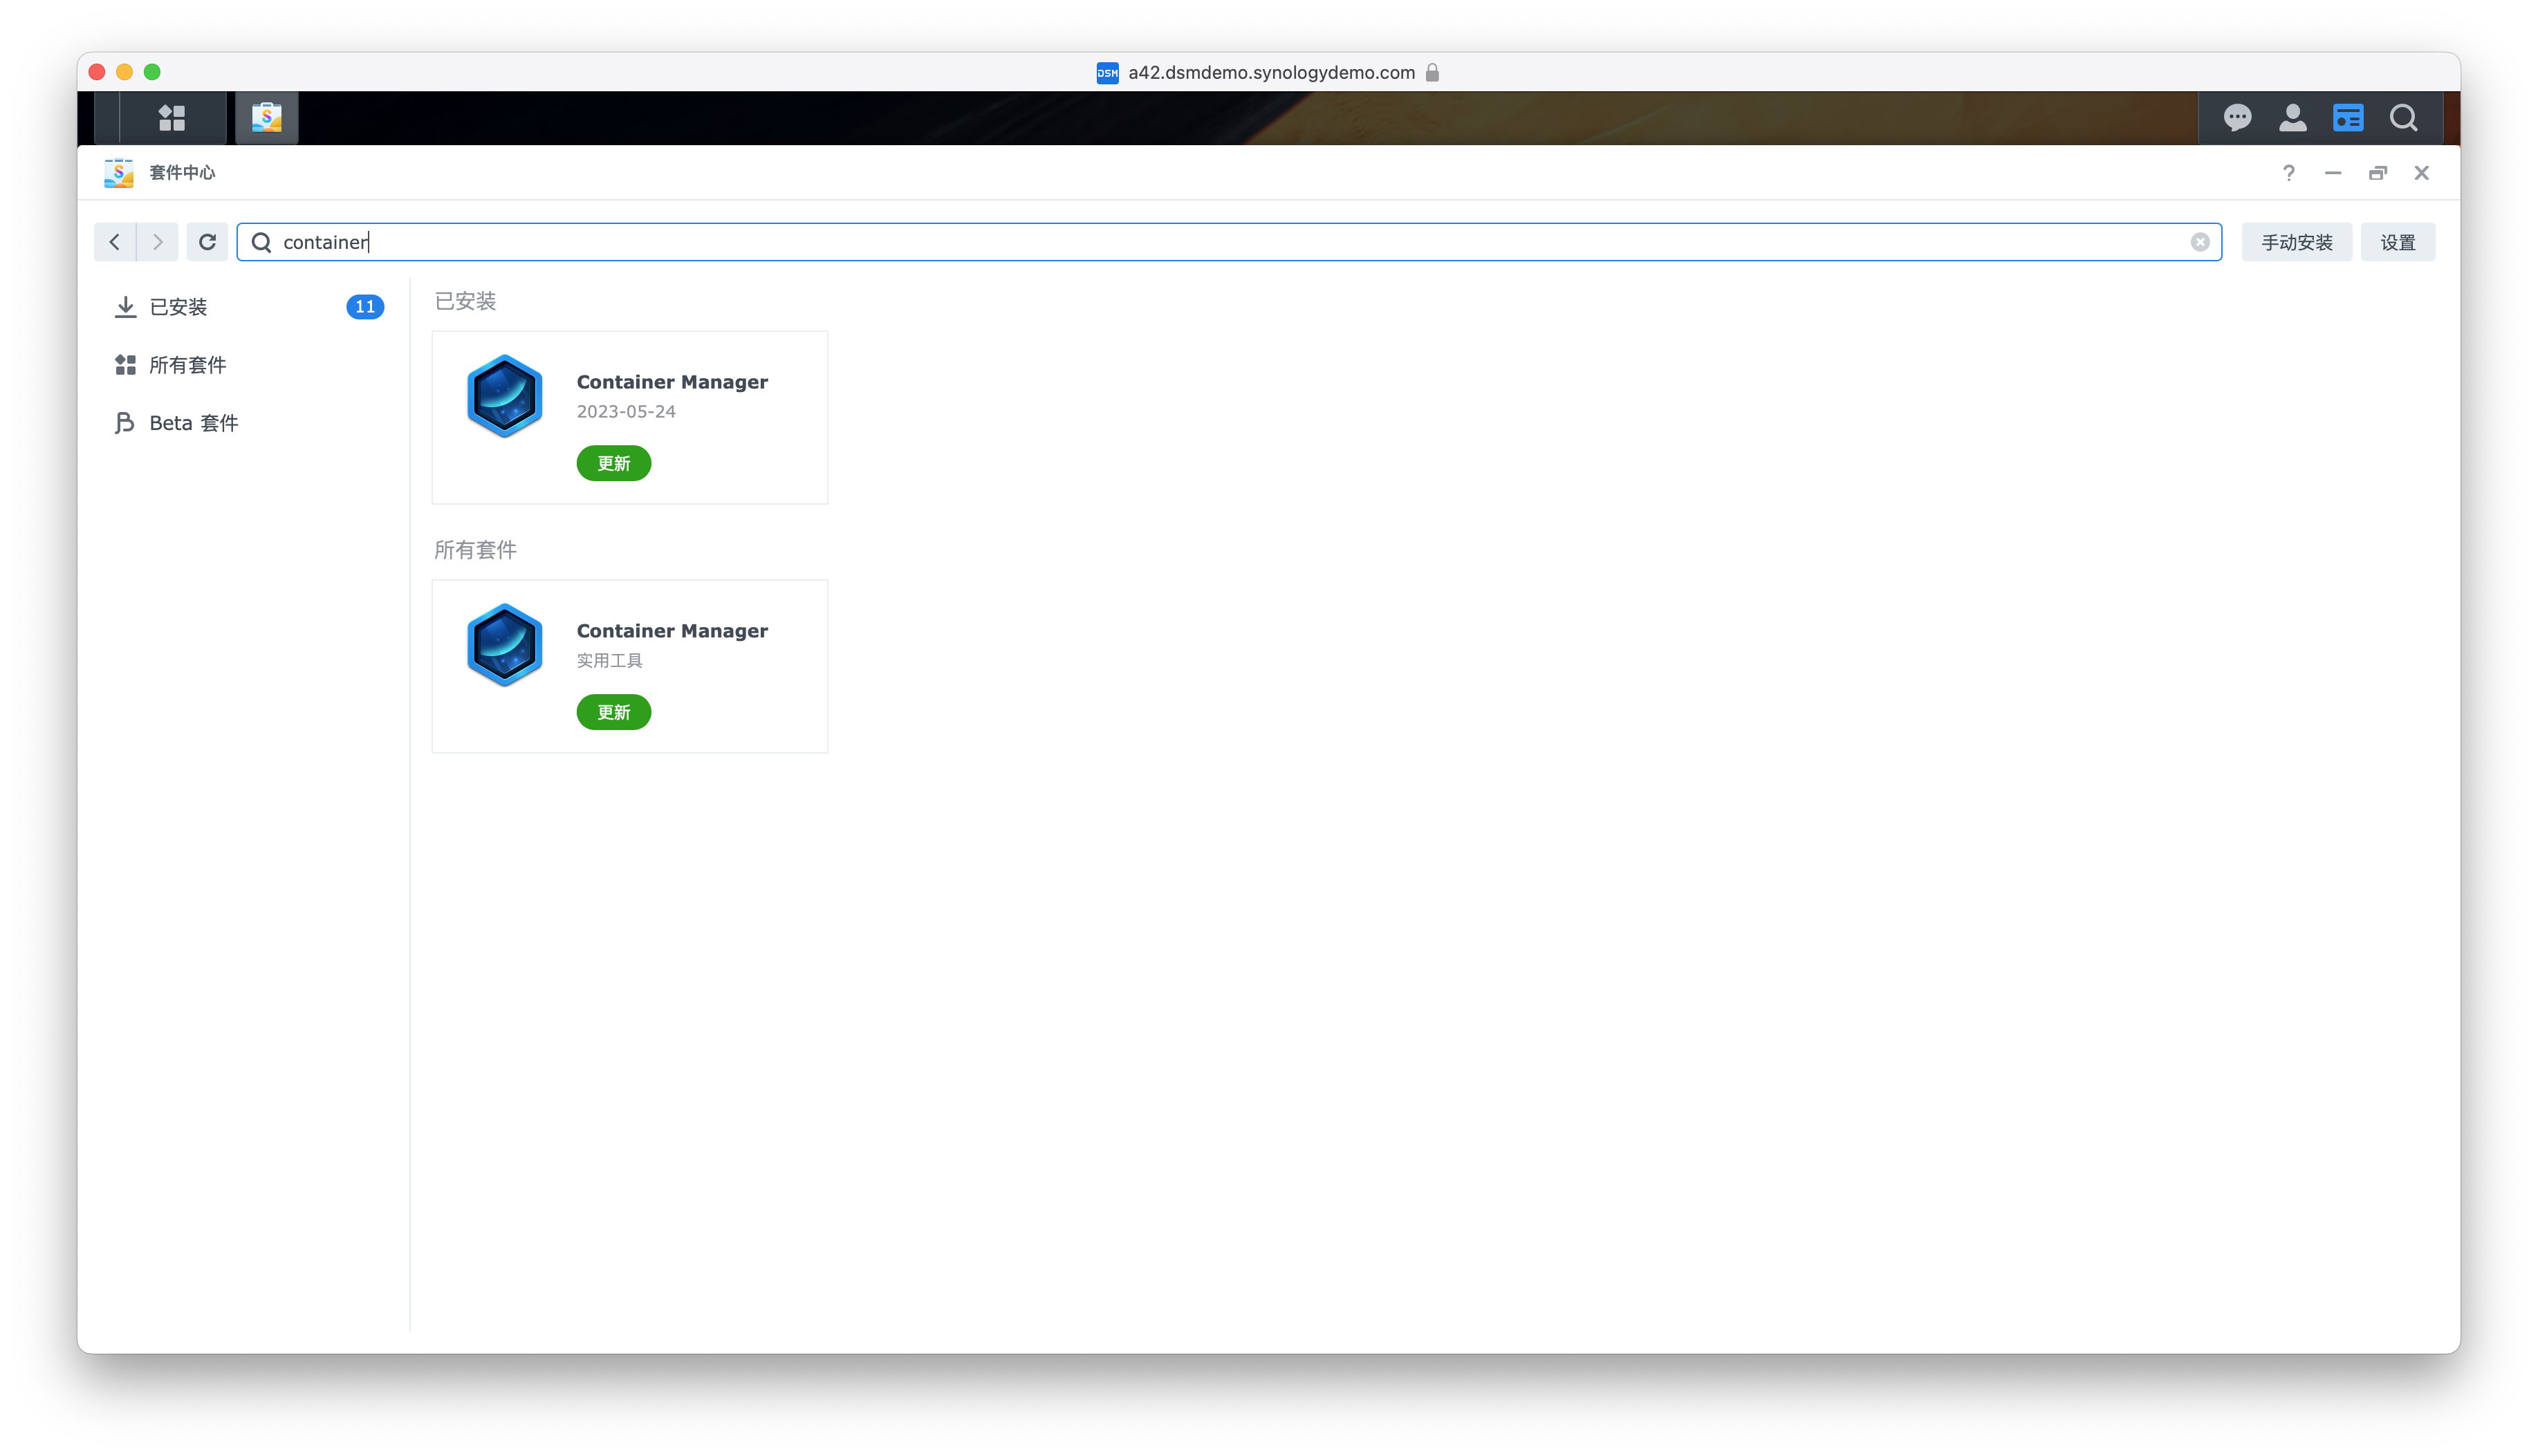
Install Container Manager (Docker) Package
Open Package Center and install the Container Manager (Docker) package.
Install AB via Docker Compose
Click Project, then click Create, and select Docker Compose.
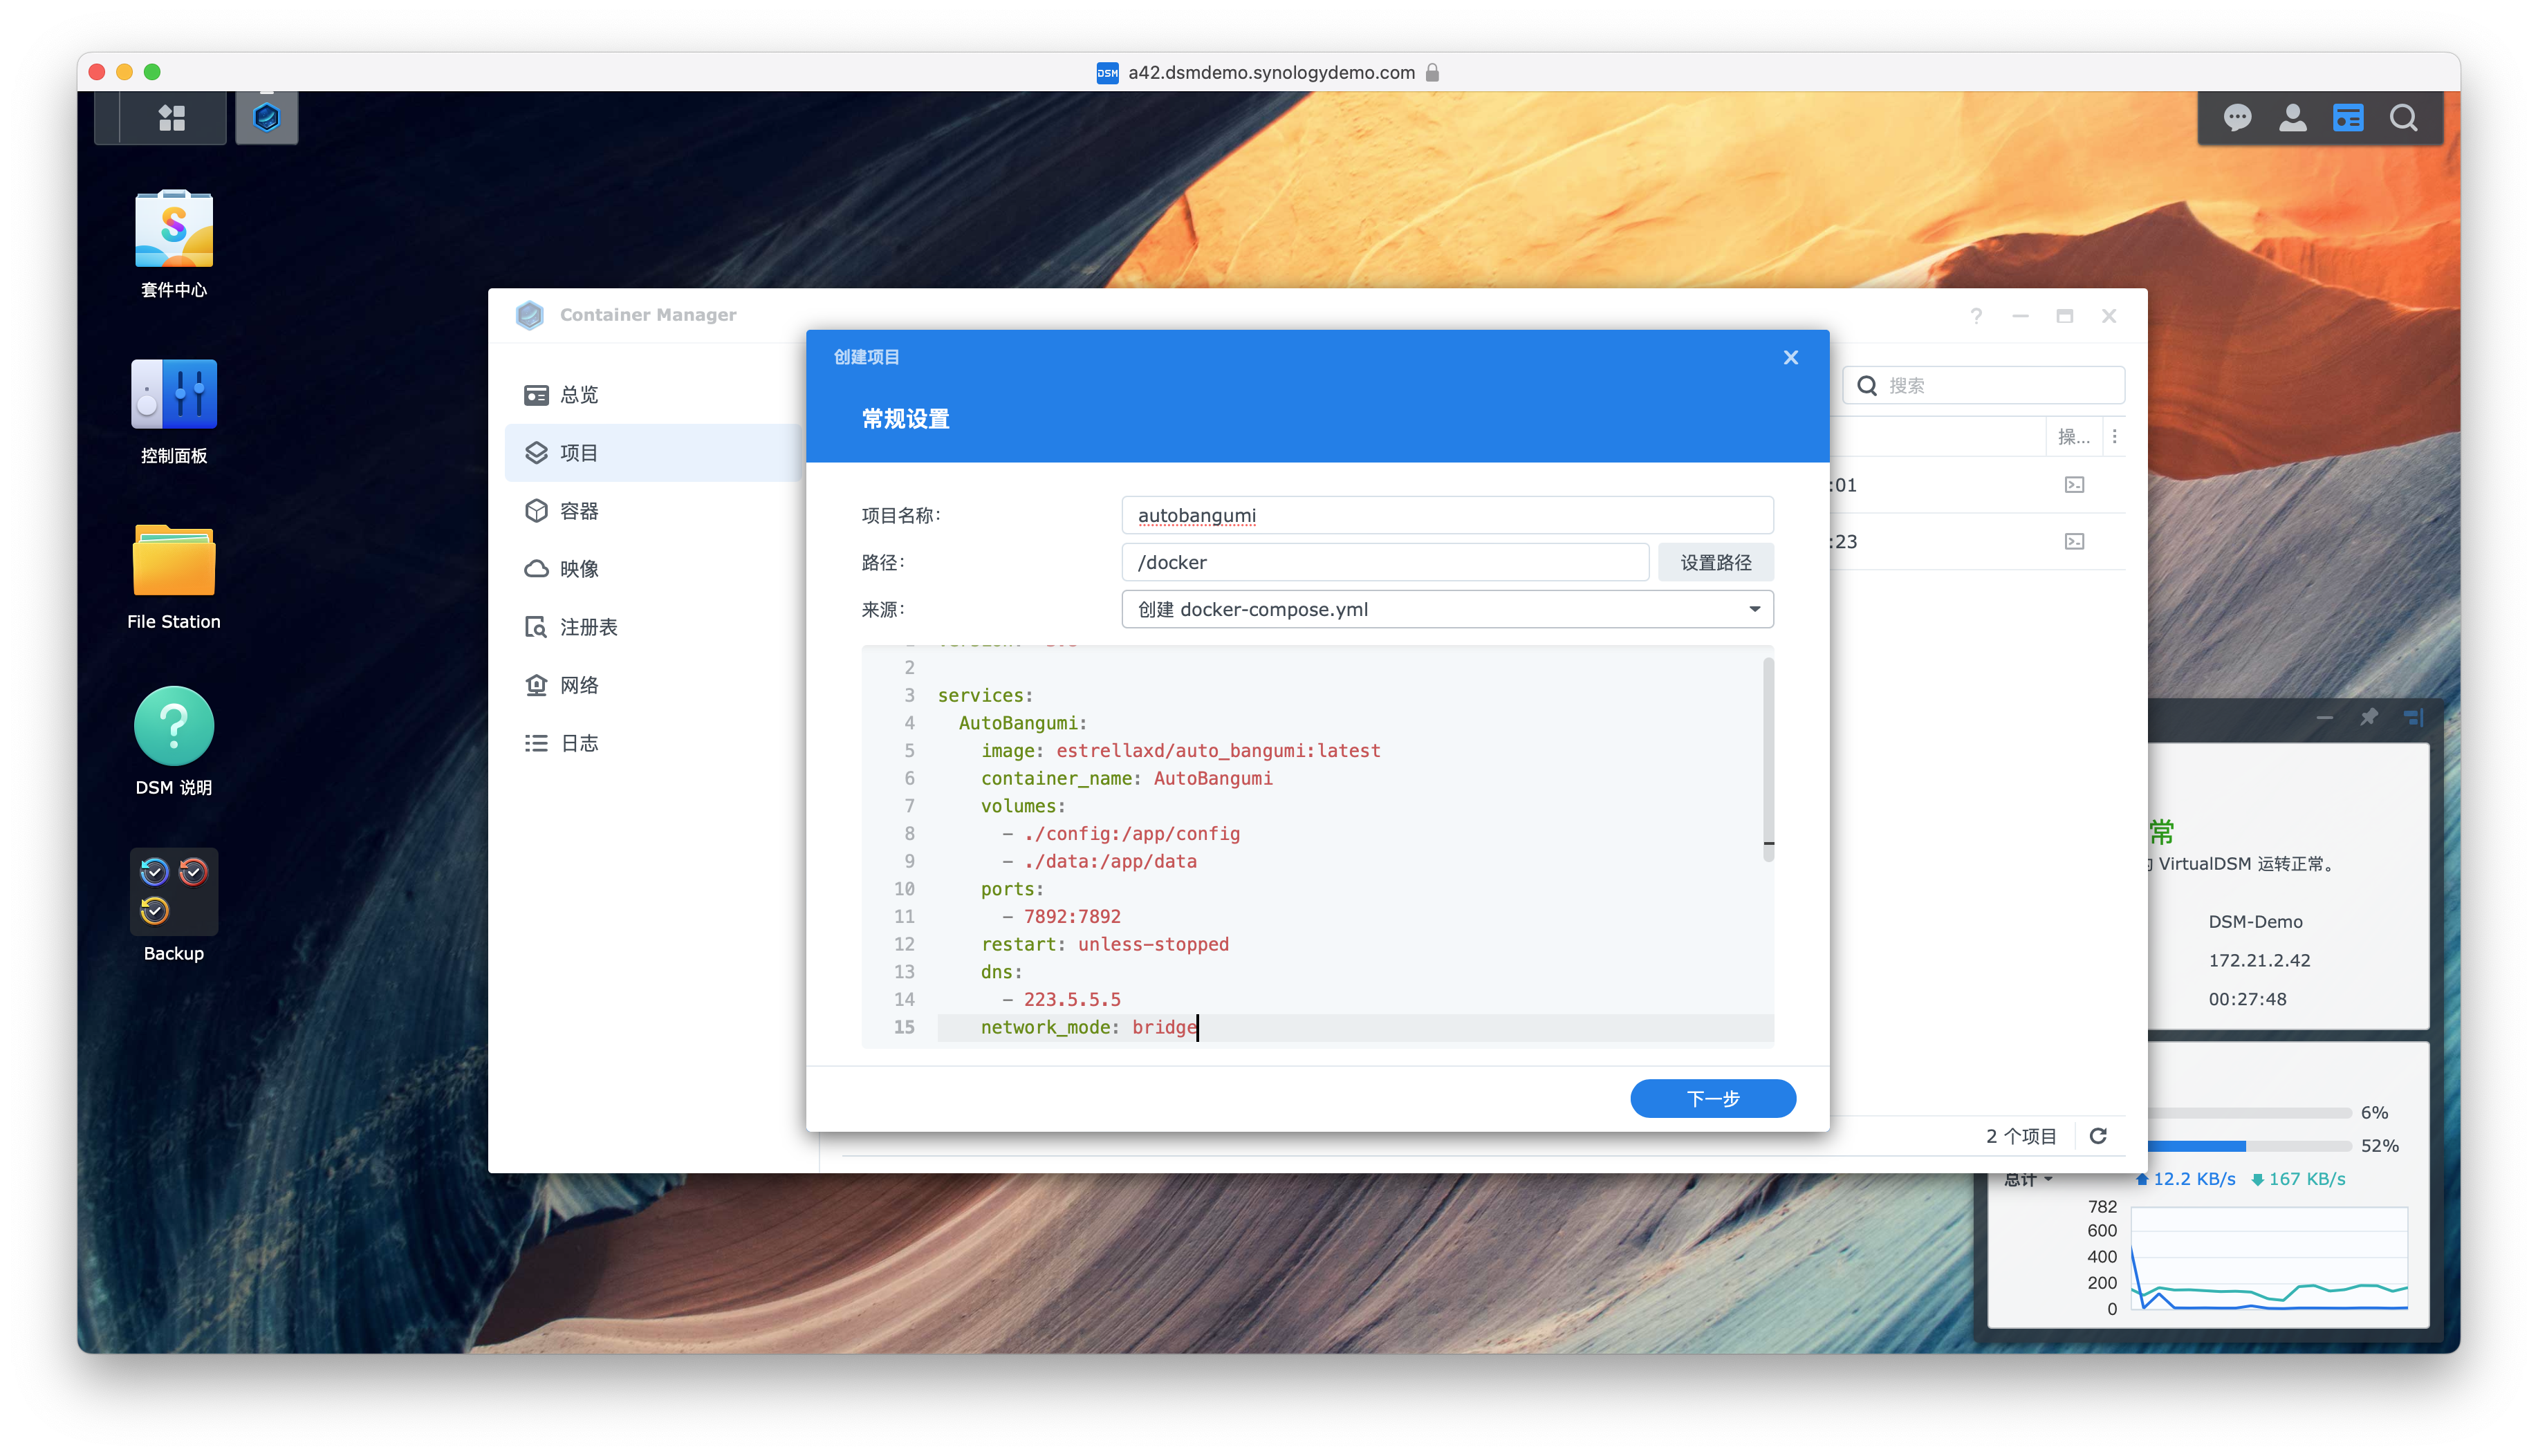
Copy and paste the following content into Docker Compose:
version: "3.4"

services:
  ab:
    image: "ghcr.io/estrellaxd/auto_bangumi:latest"
    container_name: "auto_bangumi"
    restart: unless-stopped
    ports:
      - "7892:7892"
    volumes:
      - "./config:/app/config"
      - "./data:/app/data"
    network_mode: bridge
    environment:
      - TZ=Asia/Shanghai
      - AB_METHOD=Advance
      - PGID=1000
      - PUID=1000
      - UMASK=022
Click Next, then click Done.
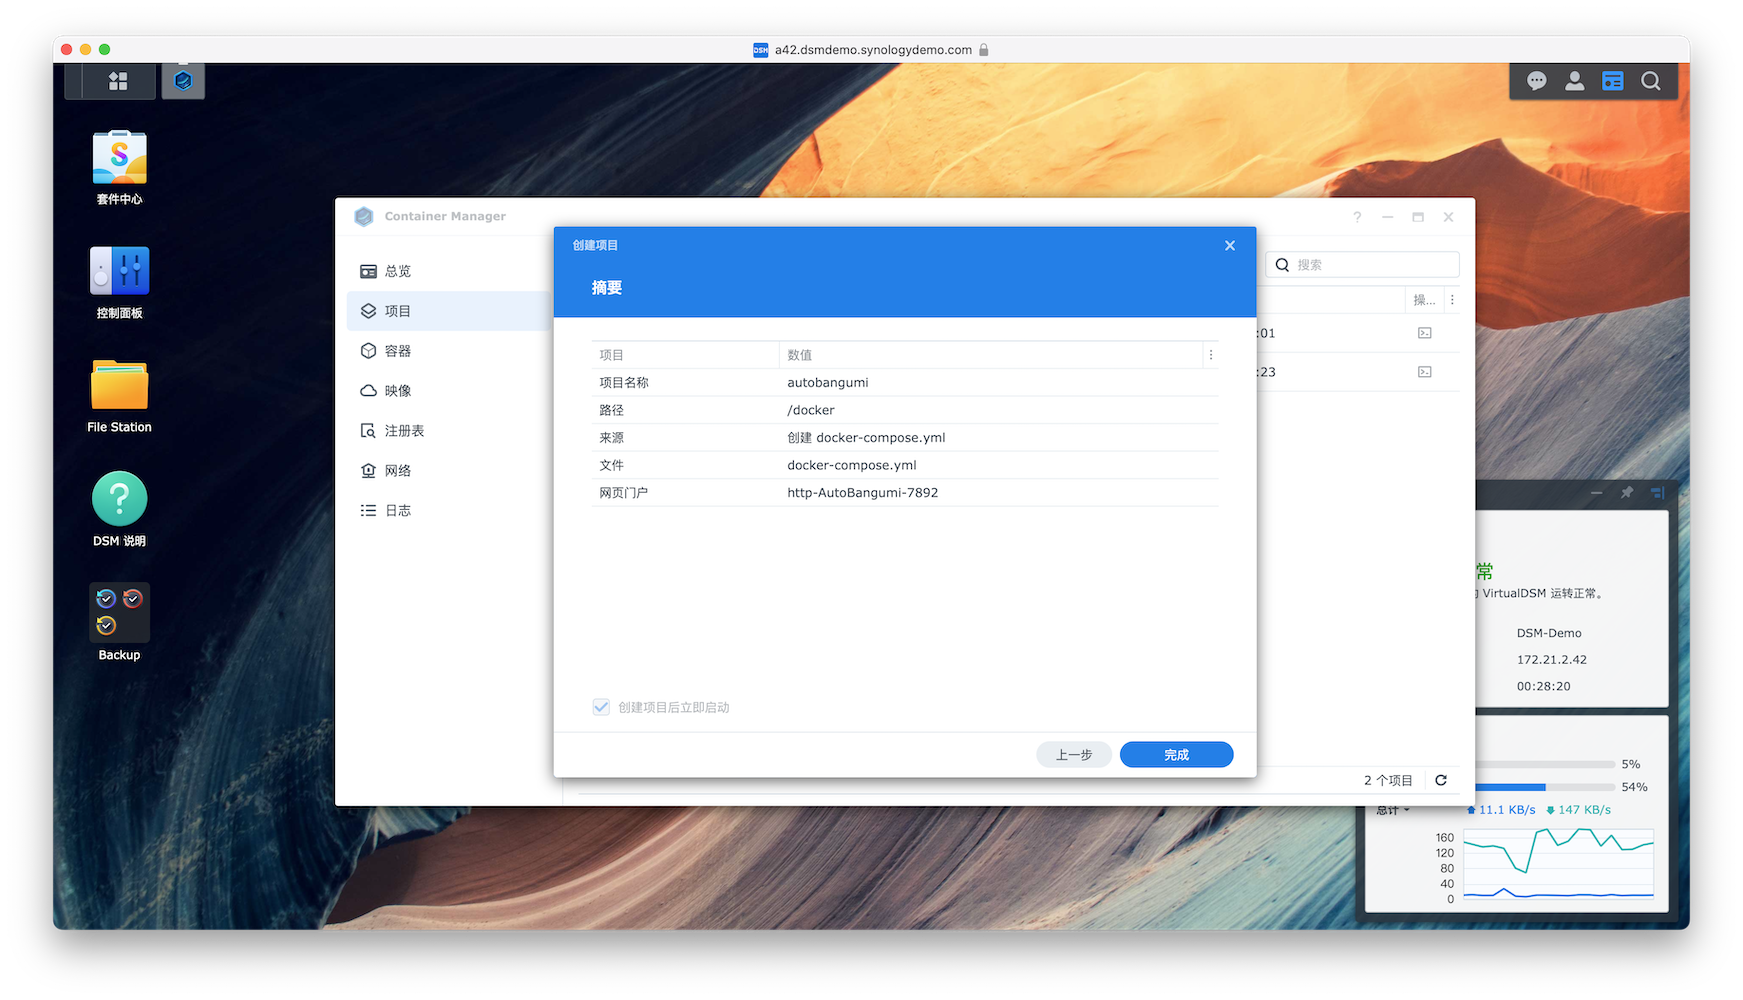
After creation, access http://<NAS IP>:7892 to enter AB and configure it.
Install AB and qBittorrent via Docker Compose
When you have both a proxy and IPv6, configuring IPv6 in Docker on Synology NAS can be complex. We recommend installing both AB and qBittorrent on the host network to reduce complexity.
The following configuration assumes you have a Clash proxy deployed in Docker that is accessible via a local IP at a specified port.
Following the previous section, adjust and paste the following content into Docker Compose:
  qbittorrent:
    container_name: qbittorrent
    image: linuxserver/qbittorrent
    hostname: qbittorrent
    environment:
      - PGID=1000  # Modify as needed
      - PUID=1000  # Modify as needed
      - WEBUI_PORT=8989
      - TZ=Asia/Shanghai
    volumes:
      - ./qb_config:/config
      - your_anime_path:/downloads # Change this to your anime storage directory. Set download path in AB as /downloads
    networks:
      - host
    restart: unless-stopped

  auto_bangumi:
    container_name: AutoBangumi
    environment:
      - TZ=Asia/Shanghai
      - PGID=1000  # Modify as needed
      - PUID=1000  # Modify as needed
      - UMASK=022
      - AB_DOWNLOADER_HOST=127.0.0.1:8989  # Modify port as needed
    volumes:
      - /volume1/docker/ab/config:/app/config
      - /volume1/docker/ab/data:/app/data
    network_mode: host
    environment:
      - AB_METHOD=Advance
    dns:
      - 8.8.8.8
    restart: unless-stopped
    image: "ghcr.io/estrellaxd/auto_bangumi:latest"
    depends_on:
      - qbittorrent
Additional Notes
The PGID and PUID values need to be determined for your system. For newer Synology NAS devices, they are typically: PUID=1026, PGID=100. When modifying the qBittorrent port, make sure to update it in all locations.
For proxy setup, refer to: Proxy Settings
On lower-performance machines, the default configuration may heavily use the CPU, causing AB to fail connecting to qB and the qB WebUI to become inaccessible.
For devices like the 220+, recommended qBittorrent settings to reduce CPU usage:
- Settings -> Connections -> Connection Limits
- Global maximum number of connections: 300
- Maximum number of connections per torrent: 60
- Global upload slots limit: 15
- Upload slots per torrent: 4
- BitTorrent
- Maximum active checking torrents: 1
- Torrent Queueing
- Maximum active downloads: 3
- Maximum active uploads: 5
- Maximum active torrents: 10
- RSS
- RSS Reader
- Maximum number of articles per feed: 50
- RSS Reader